As a developer at Infraspec, I am responsible for managing internal tooling and ensuring the smooth operation of local tooling and network services in our office. We had a cluster of Raspberry Pi devices available and saw an opportunity to utilize them by setting up a Kubernetes cluster. This allowed us to cost-effectively utilize our existing hardware and avoid the expense of purchasing additional infrastructure. However, we recognized that configuring a full Kubernetes cluster on resource-constrained devices like Raspberry Pis could be challenging. To mitigate these difficulties, we chose to use k3s, a lightweight version of Kubernetes optimized for edge computing and Internet of Things (IoT) environments.
To automate the process, we used Ansible to set up the k3s cluster and GitHub Actions to deploy services on top of it.
In this blog, I want to share my learnings and a step-by-step configuration setup to provision a lightweight k3s cluster on Raspberry Pis.
1. Our Hardware Setup

We used 6 Raspberry Pis in total, including:
- 3 Raspberry Pi 4’s with 4GB of RAM
- 1 Raspberry Pi 4 with 8GB of RAM
- 2 Raspberry Pi 4’s with 2GB of RAM
These Raspberry Pi’s were used as data nodes in our k3s cluster.
For the control plane, we used an ODROID-H2 which had:
- 32GB of RAM
- 500GB SSD
We also used a NETGEAR GS310TP 8 Port POE Switch, which allowed us to pass both electric power and data along the same twisted-pair Ethernet cabling, making it easier to set up and power multiple devices at once.
If you want to know more about Power over Ethernet (PoE), check out this whitepaper.
Our hardware setup was sufficient for running a k3s cluster for our internal tooling, although it may not have been top-of-the-line. The ODROID-H2 had enough RAM and SSD storage to serve as the control plane. Although the hardware specifications may not be impressive, they were adequate for our needs.
It’s important to note that reliability was not a primary concern for our setup, as we were primarily focused on using available resources efficiently.
2. Setup Raspberry Pi headless
To use Raspberry Pis as nodes in our k3s cluster we need to set up Raspberry Pi headless, which means we will not be using a monitor, keyboard, or mouse. Instead, we will be using SSH to connect to the Raspberry Pi and configure it remotely. Headles setup doesn’t have GUI attached to it.
Download and install the Raspberry Pi Imager on your computer. You can find it on the official Raspberry Pi website or use the command
sudo apt install rpi-imagerOpen the Raspberry Pi Imager and select the “CHOOSE OS” option.
From the list of available operating systems, select “Raspberry Pi OS (other)”, and then choose “Raspberry Pi OS Lite (64-bit)” and click “CHOOSE STORAGE”.

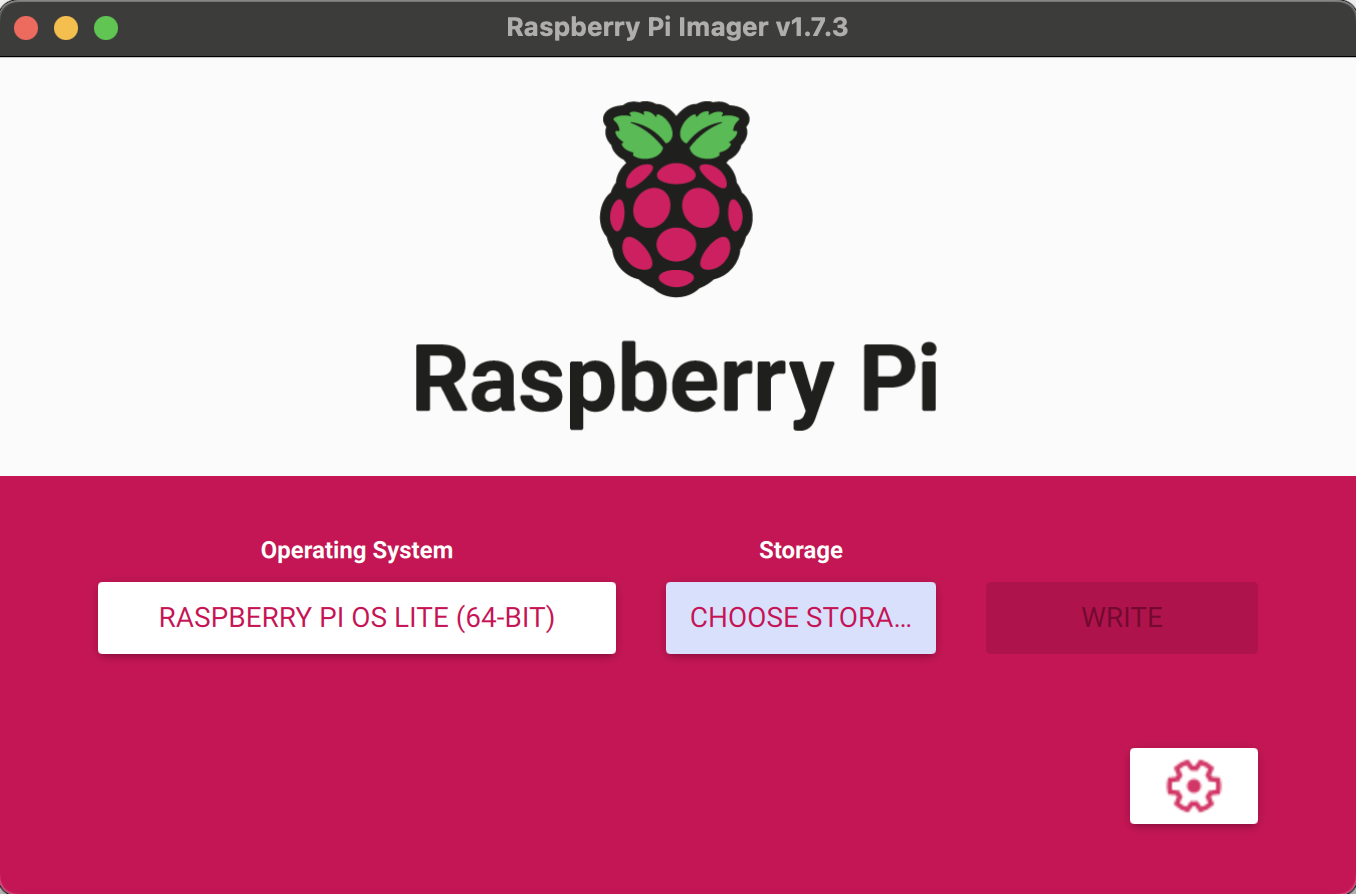
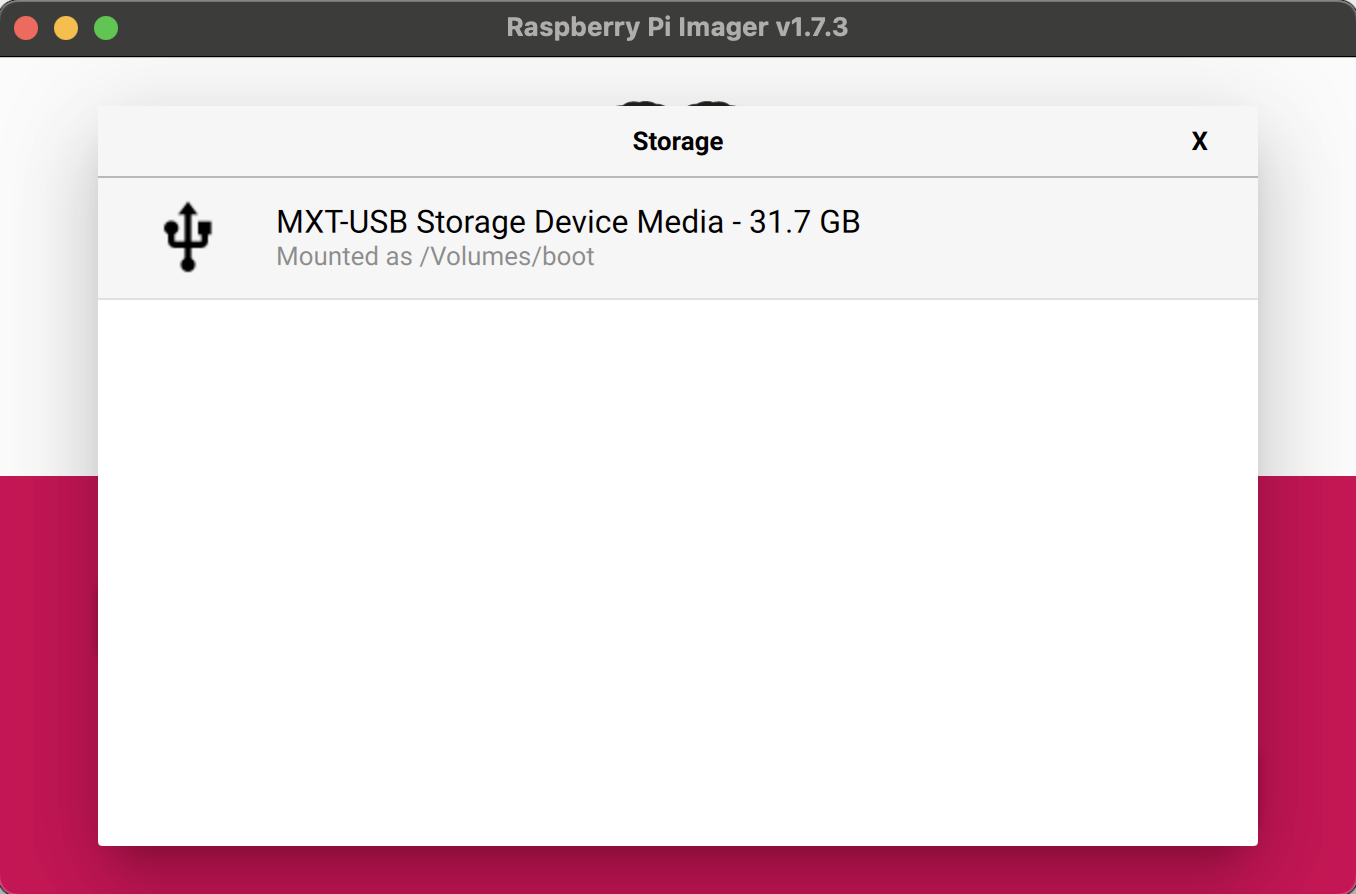
Select the SD card you want to use for your Raspberry Pi and click on the gear icon to configure Raspberry Pi.
Set up a unique hostname for every Raspberry Pi, like
knode1,knode2,knode3, etc for each node. Activate ssh with password authentication and pass in your ssh credentials. It is recommended to provide the same username and password to all the Raspberry Pis as it becomes easier to run ansible on all the nodes.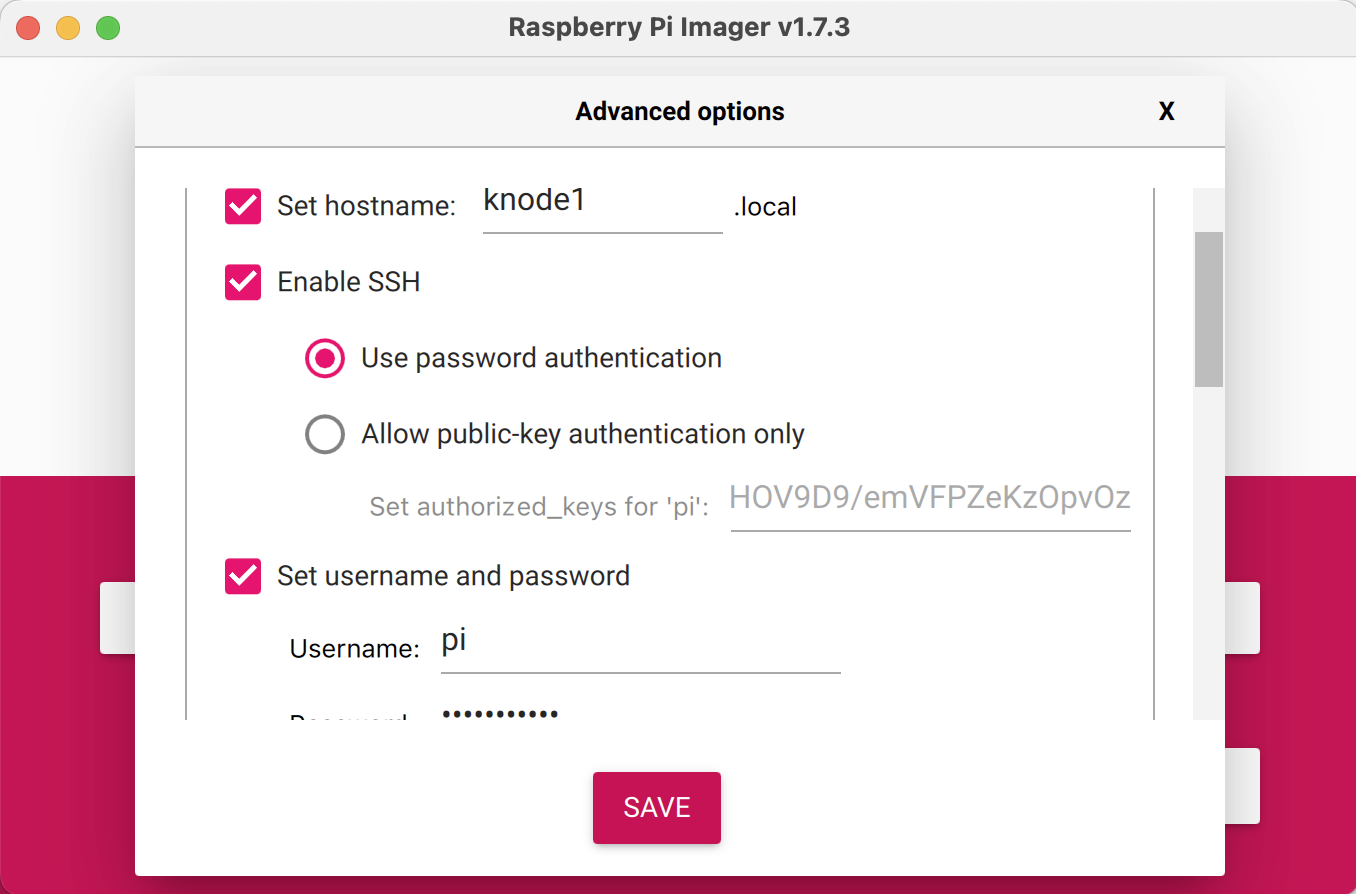
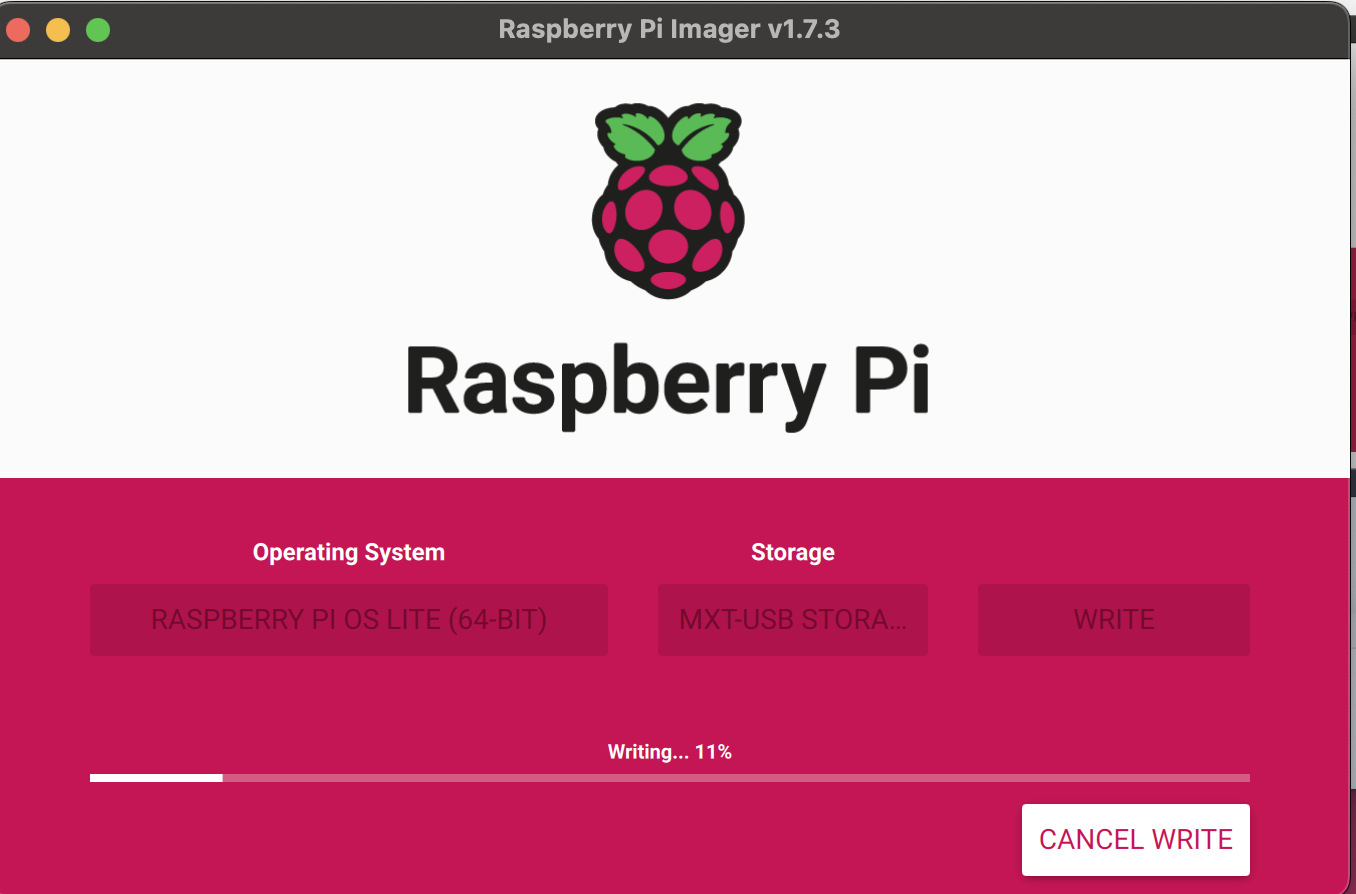
Next, click “WRITE” and note that this will clear all the existing data on the SD card. Wait for the image to be written to the SD card. This may take a while, so grab a cup of tea and relax.
Once the image has been written, eject the SD card and insert it into your Raspberry Pi.
Next, connect your Raspberry Pi to your router using Ethernet cables, and make sure to attach a power source. I’m using a NETGEAR GS310TP 8 Port POE Switch, which allows me to pass both electric power and data along the same twisted-pair Ethernet cabling. This makes it easier to set up and power multiple devices at once.

Note that, we’ll continuously be working on improving our setup, and booting Raspberry Pis from network is one of the things we’ll be working on in next iteration. Once it’s done, we’ll update this blog.
3. Setup ODROID-H2
We installed Ubuntu Server on ODROID-H2. Ubuntu Server, is an operating system for a server machine based on Ubuntu. It is a stripped-down version of the Ubuntu Desktop, shipped with the necessary tools to set up and maintain a server machine.
We used balenaEtcher to boot SD card with Ubuntu Server to install it on ODROID-H2.
Configure ODROID-H2 to allow SSH connection and set hostname to kmaster .
3. Setup k3s Cluster
To automate the process of setting up our Kubernetes cluster, I wrote ansible playbooks to handle the configuration and deployment of the cluster. These playbooks allowed us to easily set up and manage our cluster and streamline the process of deploying applications on it.
If you have used ansible before, you may already be familiar with the concept of an inventory. The simplest inventory is
a single file with a list of hosts and groups. In my case, Here’s my inventory.yaml to define the specific hosts
or
nodes that I wanted to run my playbook tasks on.
k3s_cluster:
  children:
    control_plane:
      hosts:
        kube-control-01:
          ansible_user: my_user
          ansible_host: 192.168.0.10
          ansible_python_interpreter: /usr/bin/python3
          k3s_control_node: true
    data_plane:
      hosts:
        kube-data-01:
          ansible_user: another_user
          ansible_host: 192.168.0.11
          ansible_python_interpreter: /usr/bin/python3
        kube-data-02:
          ansible_user: another_user
          ansible_host: 192.168.0.12
          ansible_python_interpreter: /usr/bin/python3
        kube-data-03:
          ansible_user: another_user
          ansible_host: 192.168.0.13
          ansible_python_interpreter: /usr/bin/python3
        kube-data-04:
          ansible_user: another_user
          ansible_host: 192.168.0.14
          ansible_python_interpreter: /usr/bin/python3
        kube-data-05:
          ansible_user: another_user
          ansible_host: 192.168.0.15
          ansible_python_interpreter: /usr/bin/python3
        kube-data-06:
          ansible_user: another_user
          ansible_host: 192.168.0.16
          ansible_python_interpreter: /usr/bin/python3
This ansible inventory defines a group called k3s_cluster with two child groups:
control_plane and data_plane.
The control_plane group contains a single host called kube-control-01, which is specified
with its ansible_user, ansible_host, and ansible_python_interpreter variables. The data_plane
group contains six hosts, each of which is specified with the same variables as the control_plane host.
The ansible_user variable specifies the username that ansible should use to connect to the host.
The ansible_host variable specifies the IP address or hostname of the host. The ansible_python_interpreter
variable specifies the path to the python interpreter on the host, which is used by ansible to execute tasks on the
host.
The k3s_control_node variable in the kube-control-01 host is a custom variable that specifies that this host
is a control plane node in the k3s cluster. This variable can be used by ansible tasks and templates to customize the
behavior of the role for control plane nodes. Note that reliability is not our concern here, so we are not using a
highly available control plane, so we’ve used a single control plane node.
Overall, this ansible inventory defines a group of hosts that can be used to set up a k3s cluster, with a single control plane node and multiple data plane nodes. It specifies the necessary connection and authentication details for each host, as well as any custom variables that may be needed by ansible tasks and templates.
I used PyratLabs/ansible-role-k3s which helps automate the process of provisioning a k3s cluster. It provides a set of ansible tasks and templates that can be used to install and configure k3s on a set of nodes.
Now, to use the PyratLabs/ansible-role-k3s role in our playbook, we
first added it to our requirements.yaml file. This allowed us to specify the role as a dependency for our playbook
and ensured that it would be installed and configured correctly.
The syntax for adding a role to the requirements.yaml file looks like this:
roles:
  - name: xanmanning.k3s
    src: https://github.com/PyratLabs/ansible-role-k3s.git
    version: v3.3.0
Once we had added the role to the requirements.yaml file, we run the command to install the role and its
dependencies.
ansible-galaxy install -r requirements.yaml
This downloaded and installed the role from the specified repository, making it available for use in our playbook.
To use the role in our playbook site.yaml, we included it in the list of roles to be executed, like this:
- hosts: k3s_cluster
  gather_facts: yes
  become: true
  vars:
    k3s_become: true
    ansible_host_key_checking: false
  roles:
    - role: xanmanning.k3s
This playbook contains a single role called xanmanning.k3s, which is responsible for installing and configuring
k3s on the hosts in the k3s_cluster group.
Once you have Ansible installed, you can use the following command to apply the playbook:
ansible-playbook -i inventory.yaml site.yaml --extra-vars "ansible_sudo_pass=YOUR_PASSWORD"
This command will apply the playbook defined in site.yaml to the hosts defined in inventory.yaml.
The --extra-vars flag is used to pass extra variables to the playbook at runtime.
In this case, the ansible_sudo_pass variable is being set to YOUR_PASSWORD. This variable will be used by
the playbook tasks to specify the password that should be used when running tasks that require sudo privileges. By
running this playbook, we will be able to provision a k3s cluster on the specified hosts using Ansible.
Key Takeaways
One of the key takeaways from this project was the importance of automating the process of setting up this Kubernetes Cluster. By using ansible playbooks, I was able to streamline the configuration and deployment of the cluster, making it easier to set up and manage. If I had chosen to go the manual route of setting up a k3s cluster, rather than using automation tools like Ansible, the process would likely have been much more time-consuming and prone to errors.
Another learning was the value of using a lightweight version of Kubernetes like k3s, which is specifically designed for edge computing and IoT scenarios. This allowed me to set up a cost-effective and efficient cluster that was well-suited for my needs.


